Advanced Fax Settings
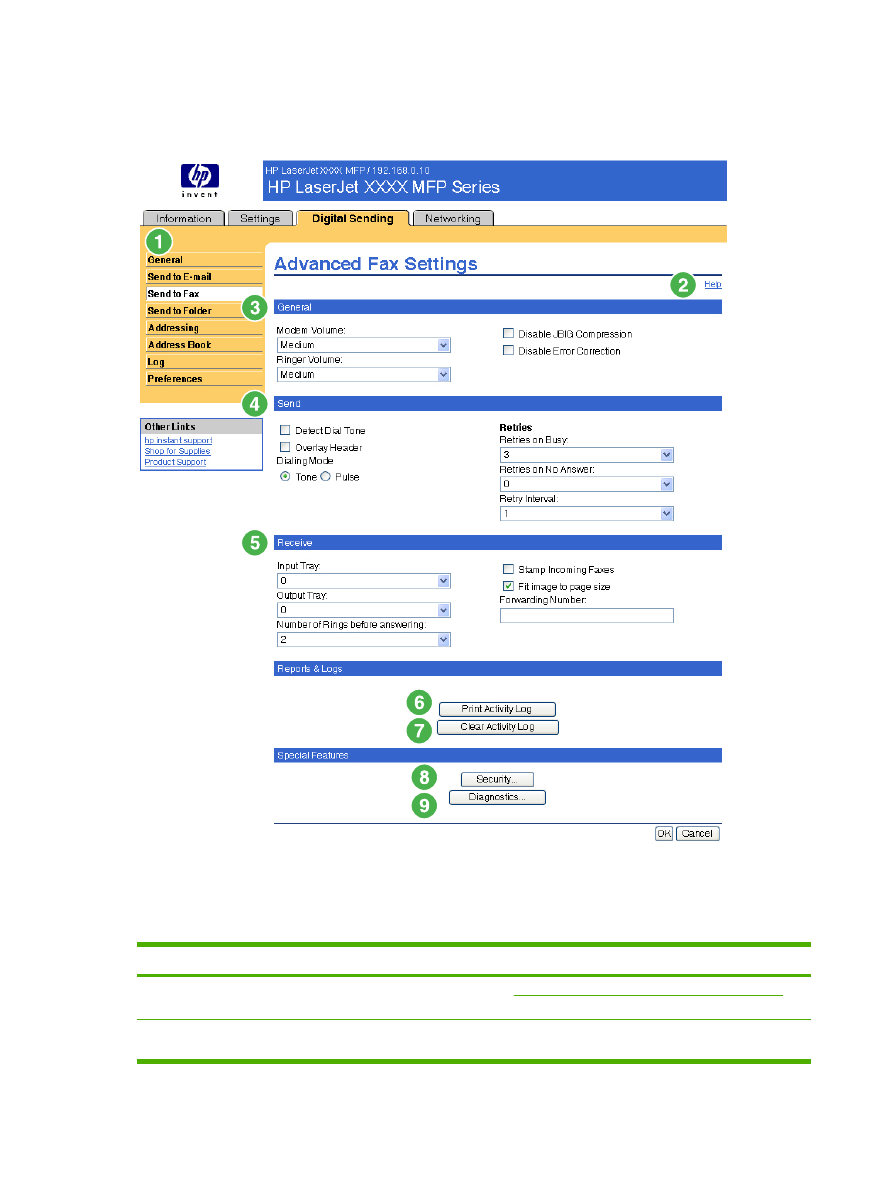
The following illustration and table describe how to use the Advanced Fax Settings screen.
Figure 4-5
Advanced Fax Settings screen
Table 4-5
Advanced Fax Settings
Callout
Area on the screen
Information or capability that the area provides
1
HP EWS tabs and
menus
For more information, see
Navigating through the HP Embedded Web Server
.
2
Help
Click to open a help file that contains information about the screens on the Digital
Sending tab.
60
Chapter 4 Setting the digital sending options
ENWW

Callout
Area on the screen
Information or capability that the area provides
3
General
Select the general settings, such as modem and ringer volume and whether to turn
JBIG compression and Error Correction on or off.
4
Send
Select the settings for faxes that are sent from the product, such as whether to
check for a dial tone before sending, whether the header should appear at the top
of the fax, or how many times you want the product to retry if the receiving fax line
is busy or does not answer.
5
Receive
Select the settings for received faxes, such as which output bin the faxes are to be
delivered, if you want incoming faxes to be scaled to the size of paper in the input
tray, and the number of another fax product to which incoming faxes can be
forwarded.
6
Print Activity Log
Click this button to print the internal modem's fax activity log. The activity log lists
all incoming and outgoing fax calls since the log was last cleared and is printed to
the product.
7
Clear Activity Log
Click this button to clear all entries in the fax activity log. HP recommends printing
the fax activity log periodically for record-keeping purposes, and then clearing the
fax activity log to keep its size to a minimum.
8
Security
Click this button to set the security features for the internal modem. The first time
you configure the security features, you are asked to type (and confirm) a Security
PIN. Thereafter, you will need that PIN to view and reconfigure the security features.
9
Diagnostics
Click this button to set the diagnostic features of the internal modem.
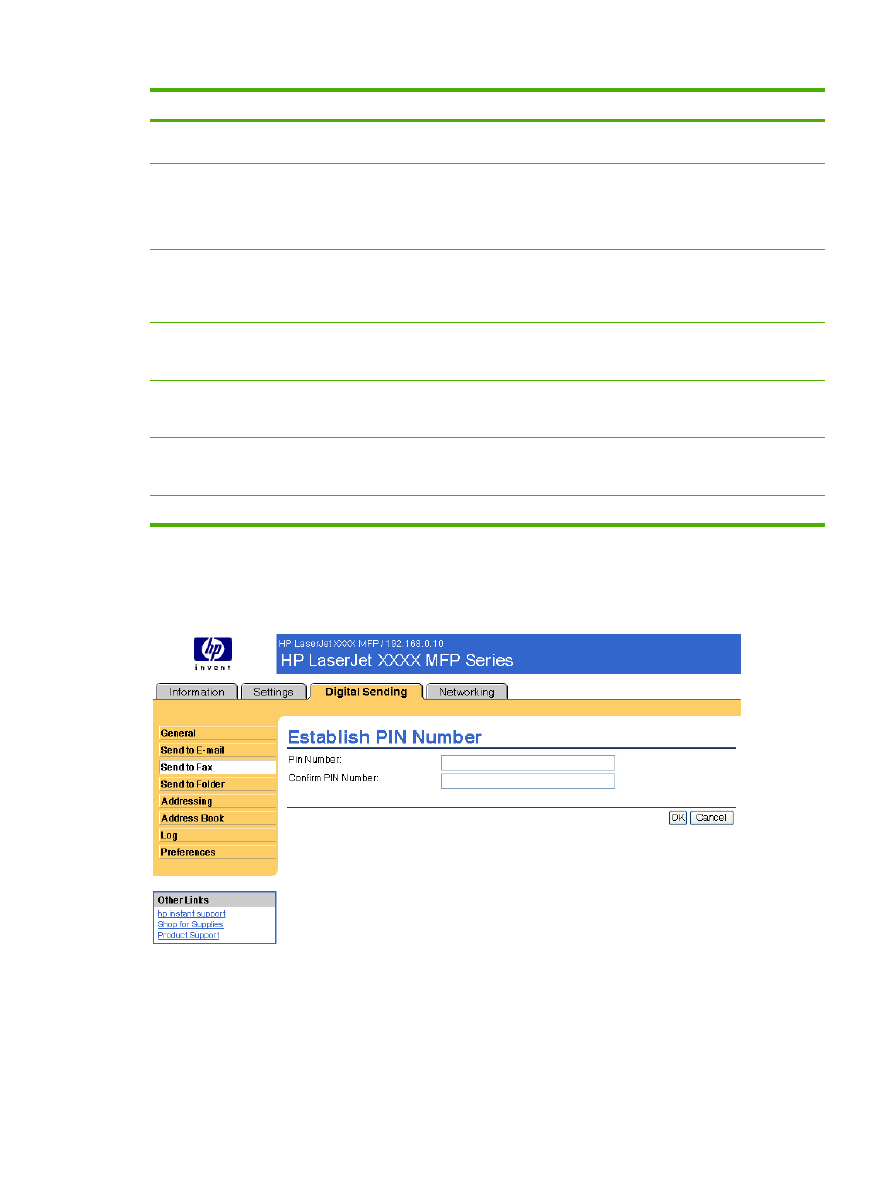
When you click the Security button, the Establish PIN Number screen appears. You can use this
screen to establish a user-specific personal identification number (PIN) to control access to the Send
to Fax feature.
Figure 4-6
Establish PIN Number screen
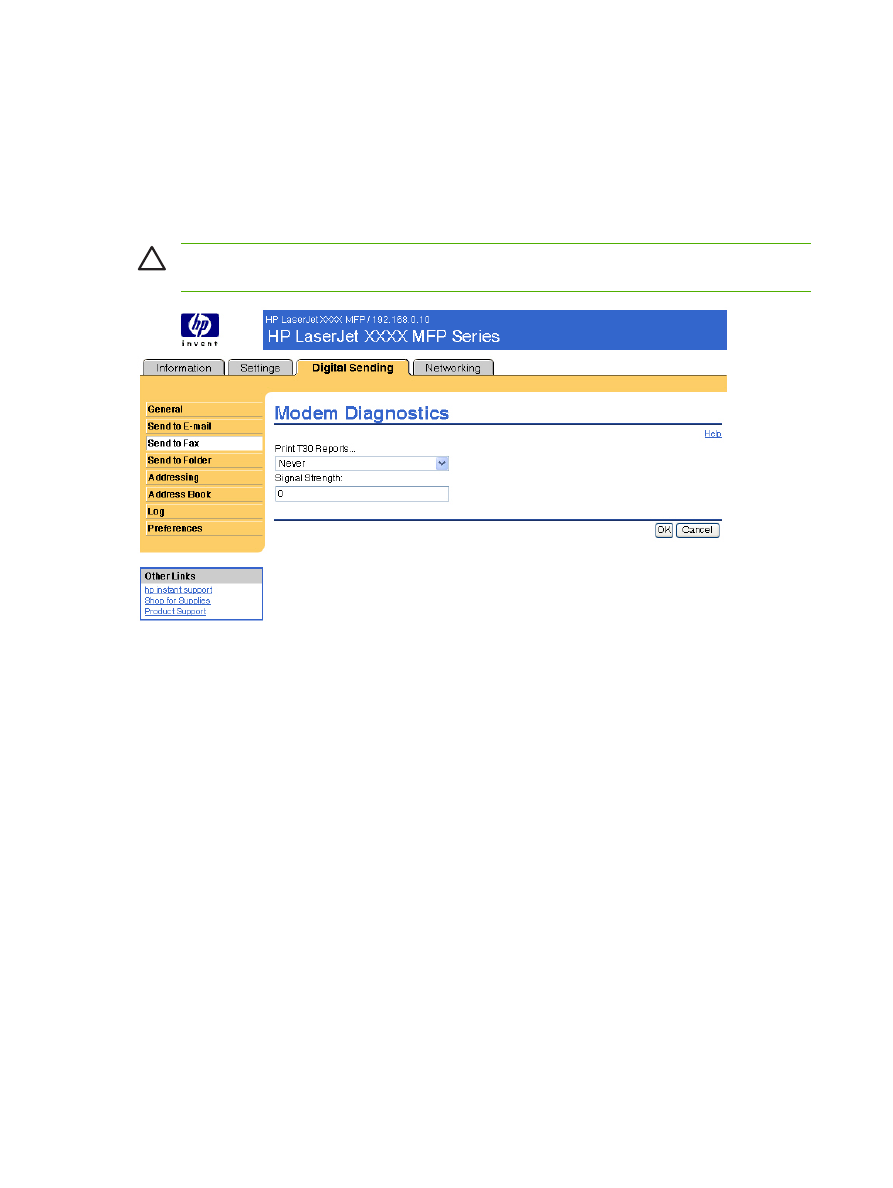
When you click the Diagnostics button on the Advanced Fax Settings screen, the Modem
Diagnostics screen appears, as shown in the following illustration.
Table 4-5
Advanced Fax Settings (continued)
ENWW
Send to Fax
61

In the Print T30 Reports field, you can set the frequency with which T30 reports are printed. T30 reports
are detailed reports about the fax communication that occurs during the most recent fax transaction.
The reports are useful when diagnosing failed fax sessions and may be requested by a service
technician should a support call be necessary. The report will be printed at the MFP either on request
or in accordance with the setting you choose.
In the Signal Strength field, you can adjust the fax signal strength used to communicate on the phone
line.
CAUTION
The Signal Strength setting should not be adjusted unless you are advised to do
so by a qualified service technician in order to correct malfunctioning fax communications.
Figure 4-7
Modem Diagnostics screen
62
Chapter 4 Setting the digital sending options
ENWW