Preferences
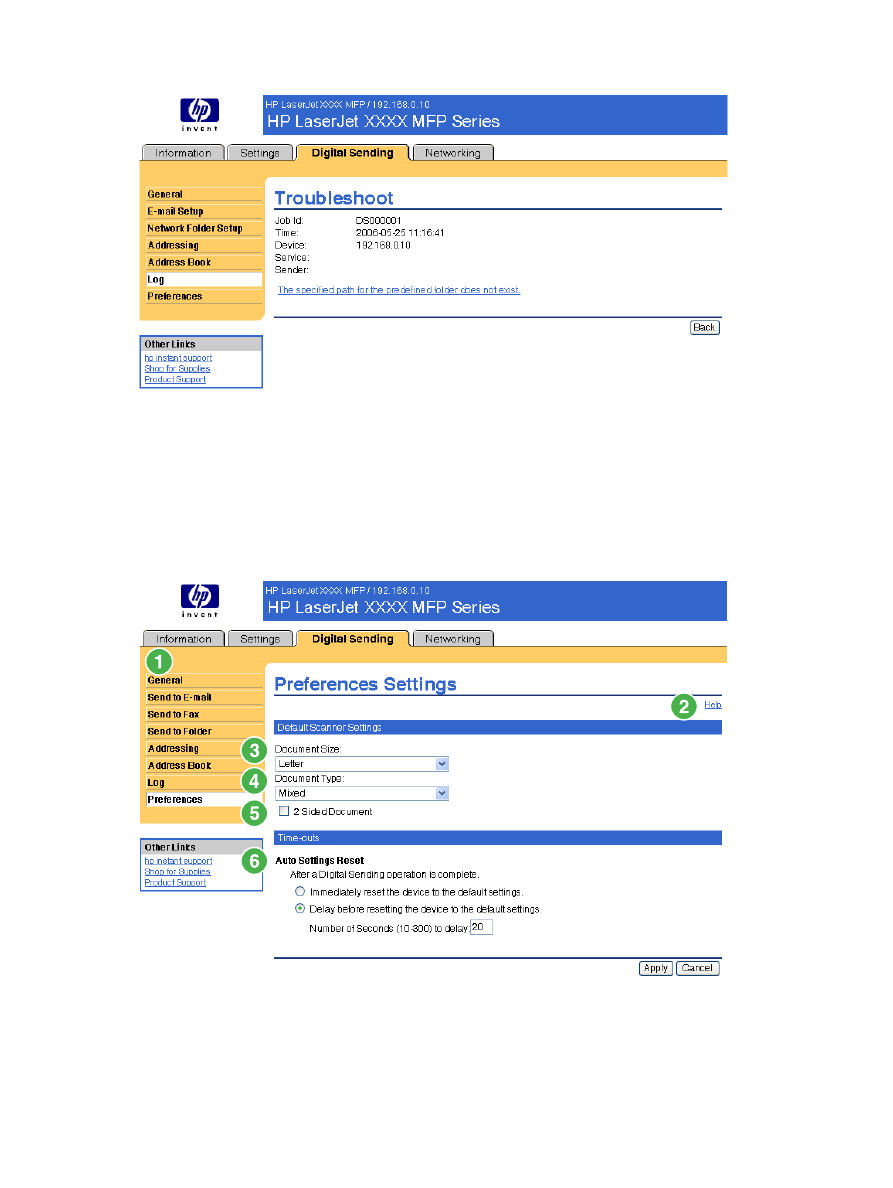
Use the Preferences Settings screen to configure general settings for the digital-sending features. The
following illustration and table describe how to use this screen.
Figure 4-15
Preferences Settings screen
74
Chapter 4 Setting the digital sending options
ENWW

Table 4-11
Preferences Settings
Callout
Area on screen
Information or capability that the area provides
1
HP EWS tabs and
menus
For more information, see
Navigating through the HP Embedded Web Server
.
2
Help
Click to open a help file that contains information about the screens on the Digital
Sending tab.
3
Document Size
Select the default media size that you want the product scanner to use when
scanning a document.
4
Document Type
Select the default media type that you want the product image processor to use
when scanning a document.
●
Text
●
Graphics
●
Mixed
5
2 Sided Document
Select this check box to have the product scan both sides of a document.
6
Auto Settings Reset
Use the time-outs options to reset all digital sending settings that are associated
with a job to the product default settings. You can have the settings reset
immediately after a digital-send operation in which the settings have been changed
by a user, or to delay the reset for any interval from 10 to 300 seconds.
ENWW
Preferences
75